Seeds and Nuts

A lot of us go into dietary changes thinking that nuts are a high allergy food because peanut allergies are so widely known now. I was surprised to find how well I tolerated some seeds and nuts, and how badly other set me off.

For me:

BAD = sunflower seeds, peanuts, walnuts, pecans, cashews

GOOD = pistachios, hemp seed, chia, flax, pumpkin seed/pepita, brazil nuts, quinoa, sesame seed

Here are some of my nut and seed staples and where I get them in bulk to cut down on costs.

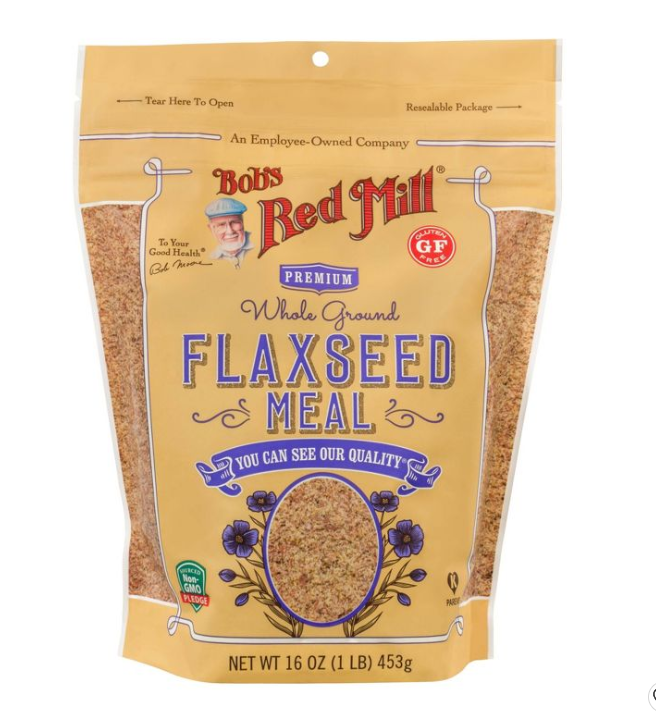
Seriously, where would the dietary restriction community be without Bob’s Red Mill? This is sold so many places anymore, for under $5. I put it into my oatmeal before cooking for extra fiber and omegas.

Chia seeds are a great source of protein, fiber, and antioxidants. I also have zero problem digesting them without cooking, which I can’t say for all seeds. They’re great in smoothies or oatmeal or even cereal, if you tolerate that. I realize that Walmart is the devil. I still can’t find organic chia seeds cheaper for this quantity other than Walmart.

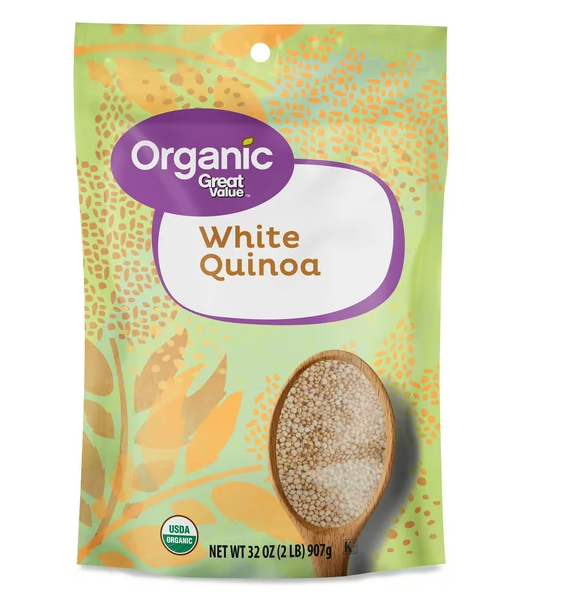
Walmart is also where I get my quinoa, also suspiciously cheap for the amount, but just as good quality as the other pricier brands I’ve tried.

Badia is a Goya competitor brand that’s sold a lot around where I live. Try bodegas or stores closer to Latin and Hispanic communities, if you’re in the states. They’re very cheap, and have little packets of all their seeds and spices for under $2 – a great way to test out if you tolerate something without having to waste money on a huge bag you can’t eat.

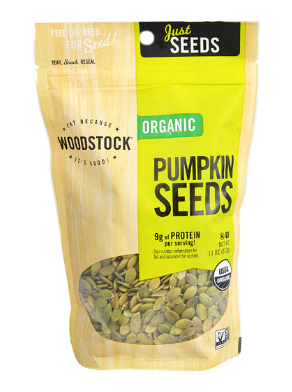
I am VERY picky about my pumpkin seeds. They have to be raw and unsalted. I’ve tried other brands and none of them taste as fresh or have lots of broken up pieces. Woodstock is sold at Vitacost online, or I’ve also gotten it at my local coop.

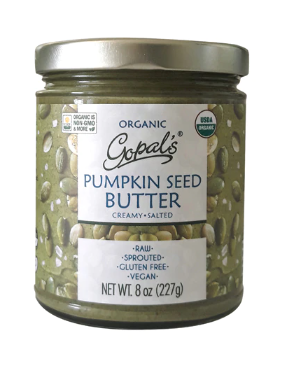
Likewise, pumpkin seed butter is the only nut butter I tolerate. I’ve seen it sold at Whole Foods sometimes, but I usually get it from Vitacost. It’s a great dip for fruit or veggies as a portable snack, or spread on rice cakes with a little coriander and honey.

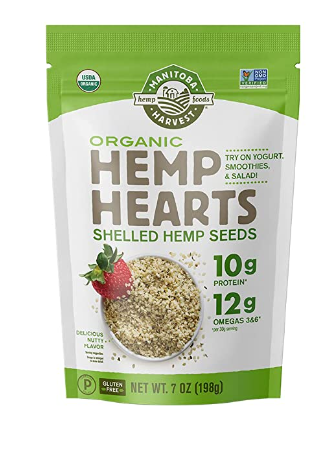
Hemp seeds might seem a bit out there, but they’re a really interesting flavor and packed with protein and omegas. This is one that I’m honestly not picky about as long as it’s shelled! Don’t get unshelled hemp seeds. Don’t do it. You think you can save a little money by shelling them yourself…. and one broken blender later, you’ll regret it. Manitoba is an affordable option and sold at a lot of health food stores and online places.

If you’re in to smoothies, hemp seed powder is high protein and low histamine. It also has a STRONG hempy taste. Some people can’t stand it for that alone. I blend it with ice cubes and frozen blueberries and a little mango and choke it down just fine. Nutiva is my trusted brand here. Keep it in the fridge after opening for freshness.

And finally, pistachios. They’re my ride-or-dye purse snack. I always have a little container of them for emergencies. To me, Wonderful has the best tasting brand. I’ve tried grocery store generics, Trader Joe’s, Walmart, Target, CVS… you name it. They all taste stale to me. Amazon has these for $6 a bag. Just make sure to stay away from the flavored ones, which are coated in all kinds of weirdness.

Instant Pot Staples

Getting an Instant Pot as a low histamine eater is honestly life changing. It’s one of the few appliances that I don’t mind giving space to in my tiny galley kitchen.

I put off getting one for the first 6 months of my low histamine diet – I didn’t grow up in a house that pressure cooked, and culturally we’re taught to fear and respect unattended cooking devices. When I did break down and get one, I got it like new off of Facebook marketplace. Turns out they’re a popular holiday gift, and there are lots of non-limited eaters out there who don’t want it and can’t wait to get rid of it.

But once I did get the hang of Instant Pot cooking, I started using it multiple times a week and bringing it with me on the rare occasion that I travel overnight. It’s excellent at time saving for some of my harder-to-cook staples and the best way to handle broth and soups.

Here are a few of my Instant Pot staple recipes that I can’t live without.

Quinoa

I like to freeze well cooked quinoa into lunch portions and then throw the thawed amount into sautéed peppers, onions, asparagus, etc for a quick pilaf.

  1. Combine 1 cup quinoa with 1 1/4 cups water in the pot.
  2. Close the lid and set to pressure cook on high for 10 minutes.
  3. Allow the pressure to naturally release for 10 minutes, then vent the remaining pressure. Open and fluff with a fork. I like my quinoa well cooked and soft, and this amount of time fully opens the germ for easier digestion.

Wild Rice

Wild rice isn’t actually rice at all, but a kind of seed! It’s high in protein and freezes and thaws well. It can be pricey if you don’t know where to purchase it. Trader Joes sells bags for a reliably low price, as does Whole Foods’ generic brand.

  1. Combine 1 cup wild rice with 1 1/4 cups water in your pot.
  2. Close the lid and set to pressure cook on high for 30 minutes.
  3. Allow the pressure to naturally release for 10 minutes, then vent the remaining pressure. Open and fluff with a fork. Properly cooked wild rice will be soft and fully split open so that the lighter colored insides are visible. If your wild rice is still closed, don’t eat it.

Brown Rice

I’m that weirdo who always used to ask for brown rice at Chinese restaurants (back when I could eat at Chinese restaurants…) instead of white rice. It has more fiber, it holds you longer, and it has a nice nutty taste.

  1. Rinse 1 cup of brown rice under water to allow the starches to drain, until the water runs mostly clear.
  2. Combine the cup of rice with 1 1/3 cups of water in your pot.
  3. Close the lid and set to pressure cook on high for 15 minutes.
  4. Allow the pressure to vent naturally.
  5. Remove the lid. Fluff with a fork and freeze into portions immediately. NEVER let cooked rice sit at room temperature for longer than two hours before eating.

Veggie Broth

Boxed or canned broth is off limits on the low histamine diet. Making your own with an Instant Pot is super easy, and also a way to ditch the sodium that a lot of pre-made broths carry.

  1. Peel and roughly quarter two small or one very large white/yellow onion. Add to pot.
  2. Add two stalks of celery snapped in half, as well as two larger carrots or several heaping handfuls of carrot peels, if you’re being thrifty.
  3. Pour in 1 tablespoon of olive oil or your tolerated oil of choice.
  4. Optional but nice – add the stalks from your shucked parsley, a bay leaf, and cracked black pepper to toleration.
  5. Add 1 tsp of salt, or more to taste. Shake in a small amount of turmeric for color.
  6. Seal your pot and set to pressure cook on high for 1 hour. Allow all pressure to release naturally.
  7. Open the pot and remove vegetables and herbs. Your broth should be golden in color and have a nice neutral taste.
  8. Decant broth into usable portions and freeze. This is my favorite silicone broth portioner.


Golden Beets

Beets are an anti-inflammatory superfood. I love how they taste but always hate the next day when you forget that you ate them and think that you’re dying when you go to the bathroom.
*Gold Beets Have Entered The Chat*
Like their purple siblings, golden beets are a root veggie with a nice earthy taste, but a little mellower. Best of all, they’re bright orangey yellow – no staining to your counter top or insides.

  1. Peel your beets. If they’re larger, cut them into pieces. All beet pieces that go into your instant pot should be roughly the same size, maybe 3 inches across.
  2. Place the metal trivet that came with your Instant Pot into the bottom of the pot, arms reaching upward towards the pot’s opening.
  3. Pour 2 cups cold water into the bottom of the pot over the trivet.
  4. Place your beets in an even layer on the trivet. Don’t stack them upwards.
  5. Close the pot and pressure cook on high for 14 minutes.
  6. Allow pressure to naturally release for another 15 minutes.
  7. Manually release all remaining pressure.
  8. Your beets should be fork tender. If they’re not, reseal the pot and cook for another 10 minutes. I’ve only had this happen once or twice, and I think it was due to under ripe beets because the cooked beets also had very little color or flavor.
  9. Freeze your beets as is or slice before freezing.

Instant Pot Black Beans

Beans on the low histamine diet are controversial. Let’s start there.

Some sites list them as histamine liberators and therefore discourage eating them. The SIGHI list has them at a rating of 2, and says that ‘Some tolerated exceptions are possible in some cases,’ whatever that means.
And most commonly, beans come in a can, with canned food being off limits for its ability to accumulate histamine. Those I don’t eat.

All my tolerated beans start as dry in a bag, then soak and are pressure cooked before being frozen in individual portions. I’ve found that these never set me off and are a true safe food. They’re also thankfully a cheap protein source, and more sustainable than animal proteins.

You’ll need:
-1 cup dry black beans (Goya is always a quality bet, or loose from a bulk store)
-5 cups of water for cooking
-5 cups of water for soaking
-Instant pot
-Colander or strainer
-Containers for freezing

  1. Soak your dry black beans in enough water to cover them by three inches, either overnight or for at least 6 hours. I’ll often throw them in water at breakfast, and they’re ready for cooking by dinner. It’s good to note that soaking black beans turns the water black and you’ll want to do this in something like a steel cooking pot or bowl, not something stainable and precious.
  2. After soaking, dump your black beans into a colander and drain. Pick out any beans that look shriveled or weird.
  3. Put your strained beans in the instant pot. Cover them with 5 cups of water. You might be tempted to use less water and more beans – don’t. This ratio is needed for proper cooking. Depending on the size of your instant pot, this means that you might be limited to cooking just one cup of beans at a time. Don’t overfill the pot! This makes a huge foamy mess.
  4. Close the lid on the instant pot and set it to pressure cook on high for 28 minutes. Then, allow the pressure to naturally release.
  5. Open the pot and test the beans for doneness. They should be quite soft. If for some reason your beans are crunchy, don’t eat them. Close the pot and pressure cook for another 10 minutes. Crunchy beans = digestive hell
  6. Immediately decant the beans into your freezing containers. I like to use jam jar sized mason jars for individual portions. Add a small amount of the bean liquid to the container to keep them from drying out when you reheat.


    Additional Tips:
    -The time for cooking applies to black beans, which are a softer bean. If you try this with something like a navy bean or great northern bean, that will take significantly longer.
    -I’ve never experienced this, but have read that using hard water with high mineral content to cook the beans can alter results. If you live in a place with hard water, consider using filtered or extending your cook time.
    -Once thawed from frozen, these mash up nicely with whatever spices and oil you can tolerate as a dip.